How to Enable Two-Factor Authentication in Blesta

This article will show you how to enable two-factor authentication in Blesta.
Before you start: you need an authenticator app on your phone before you begin. Once two-factor authentication is on, you cannot log in without it, which is why the backup code in the final step matters.
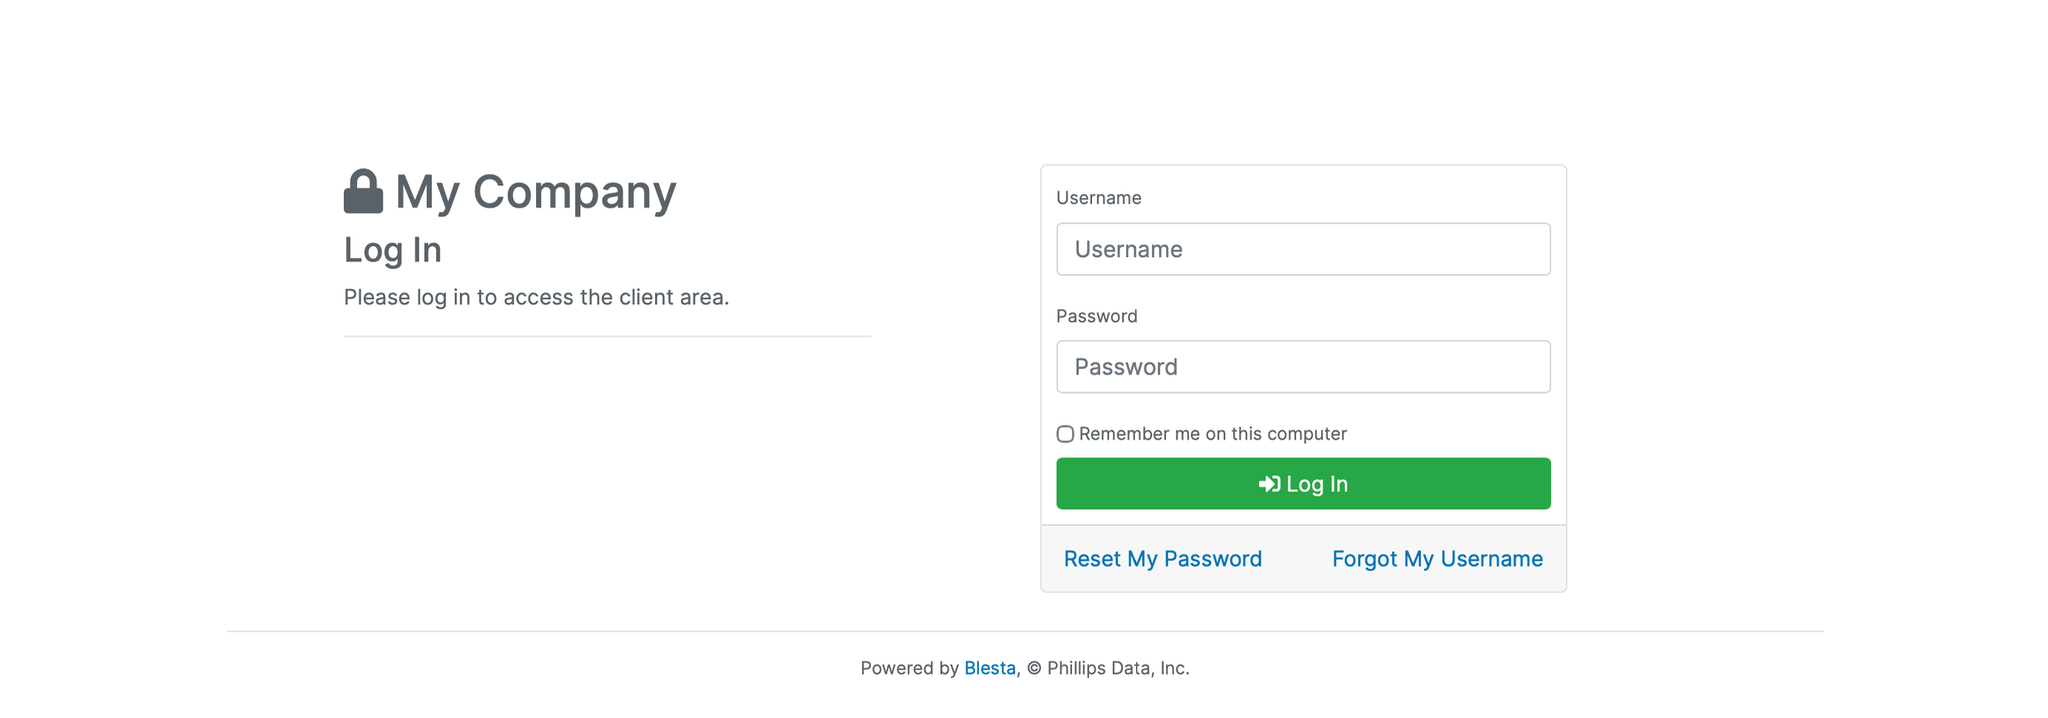
1. Log in to the Blesta Client Area
Use your credentials to log in to your Blesta client area.
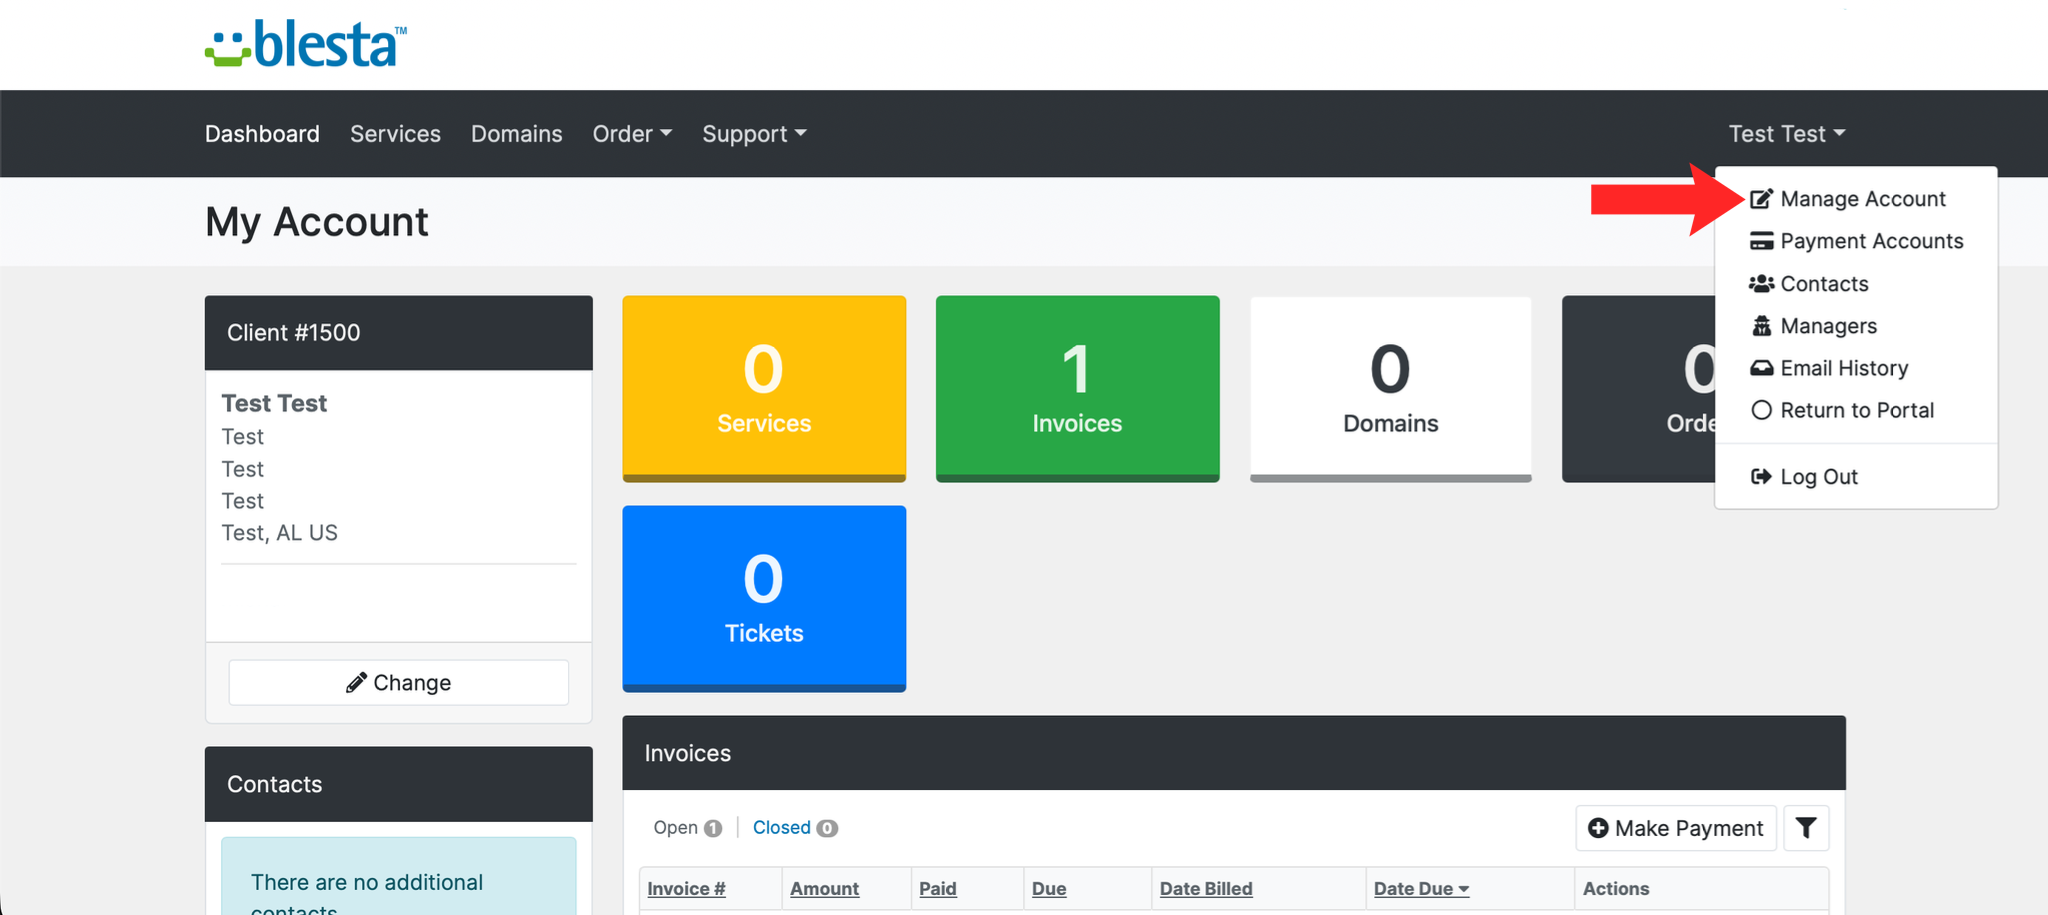
2. Navigate to Manage Account
Click on your name in the top right corner and select Manage Account.
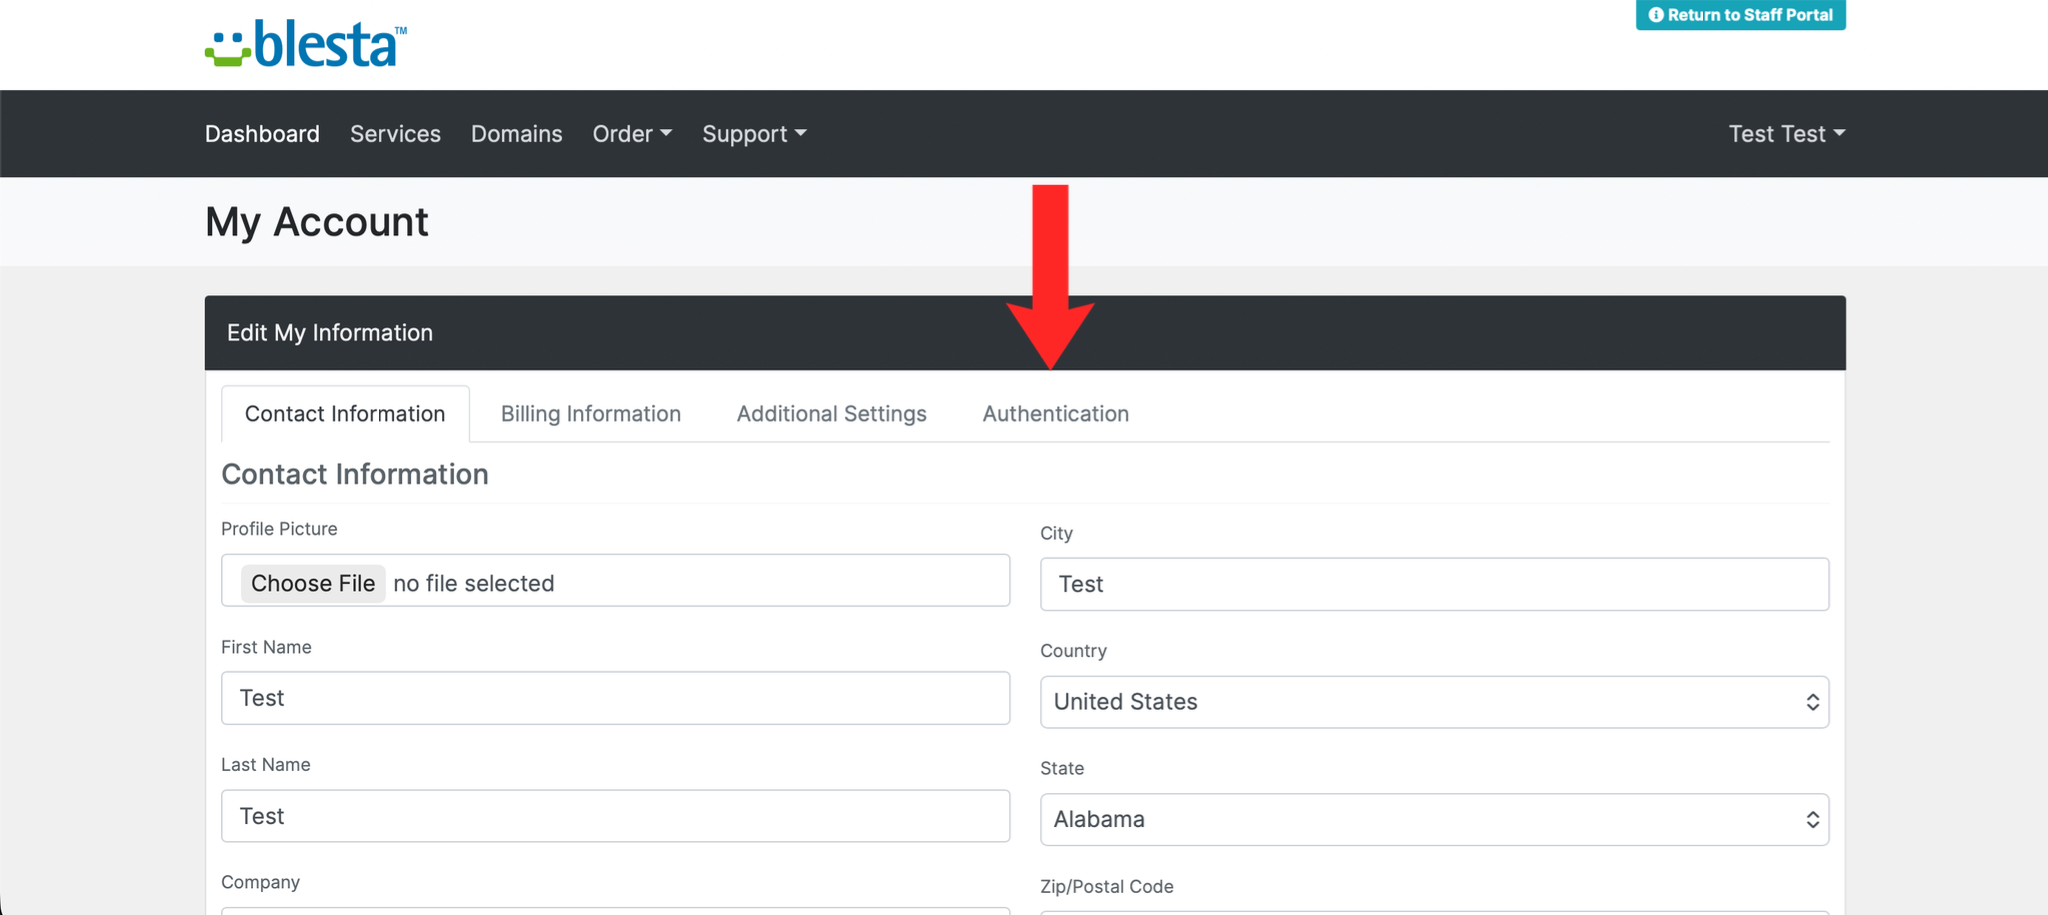
3. Open the Authentication Tab
Click the Authentication tab within your account settings.
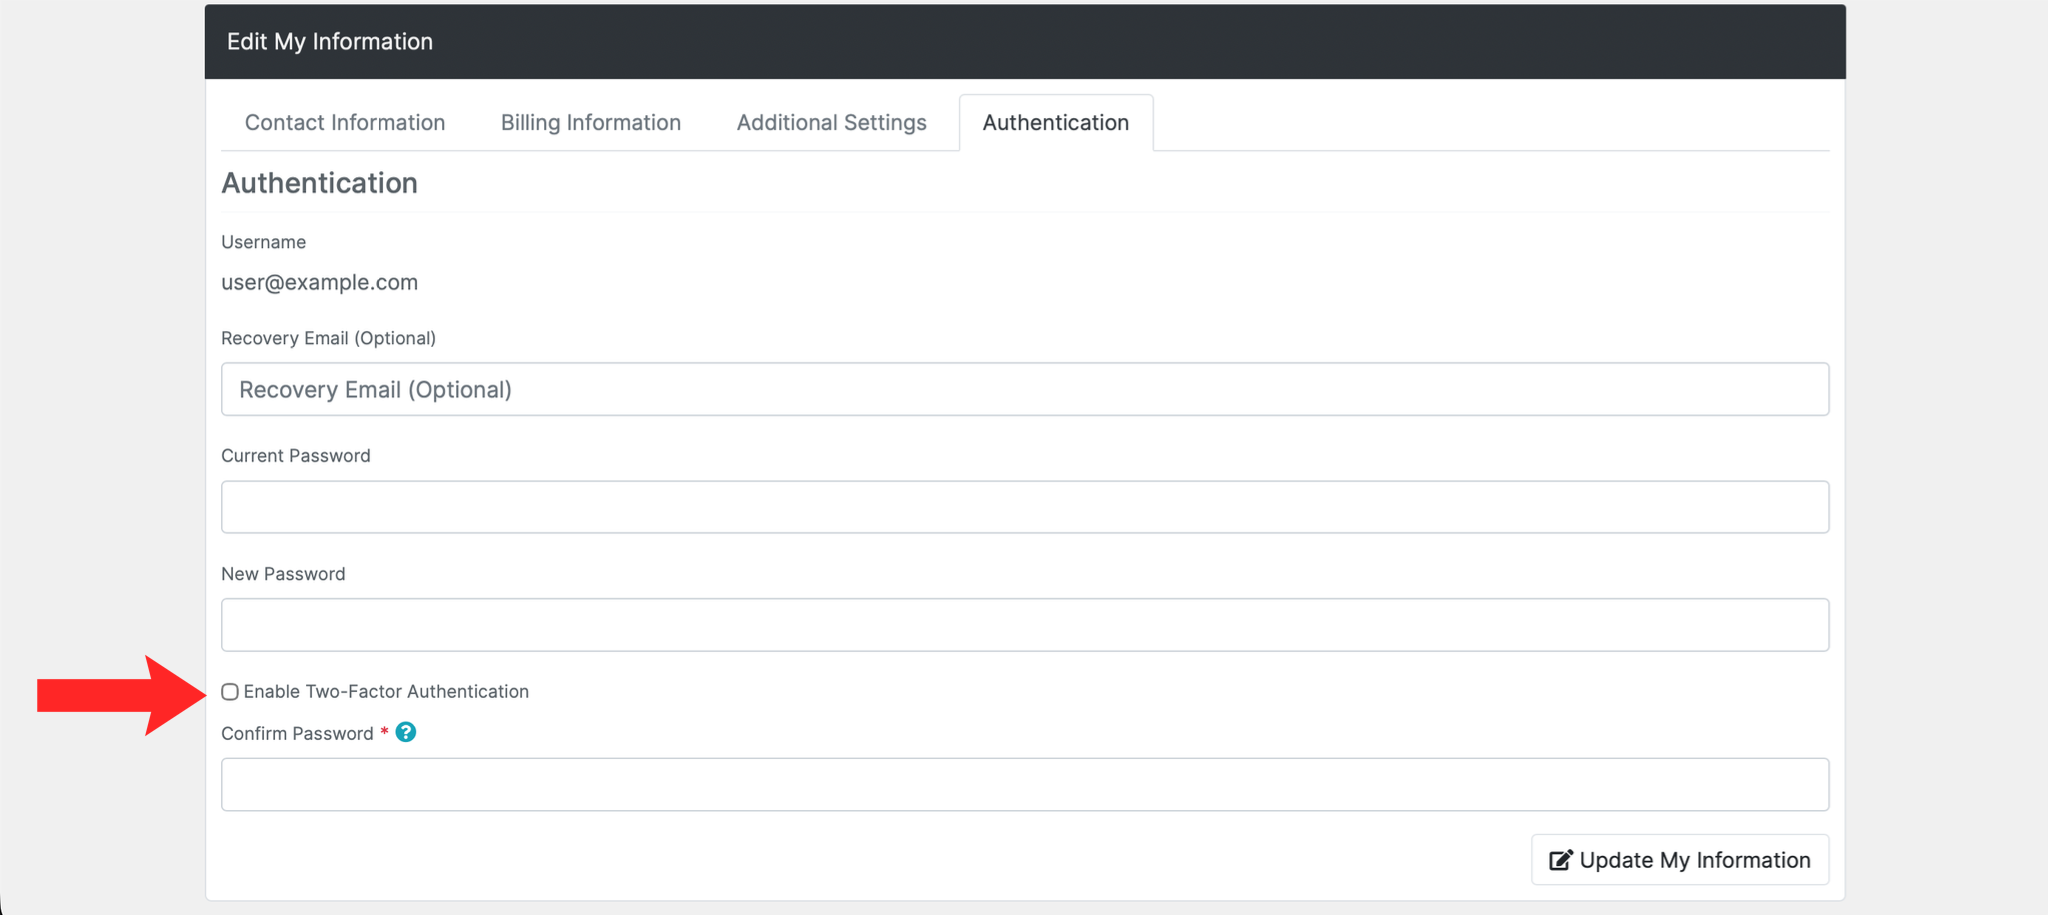
4. Enable Two-Factor Authentication
Check the box to enable Two-Factor Authentication.
5. Scan the QR Code
Open an authenticator app such as Google Authenticator or Authy and scan the QR code shown on screen.
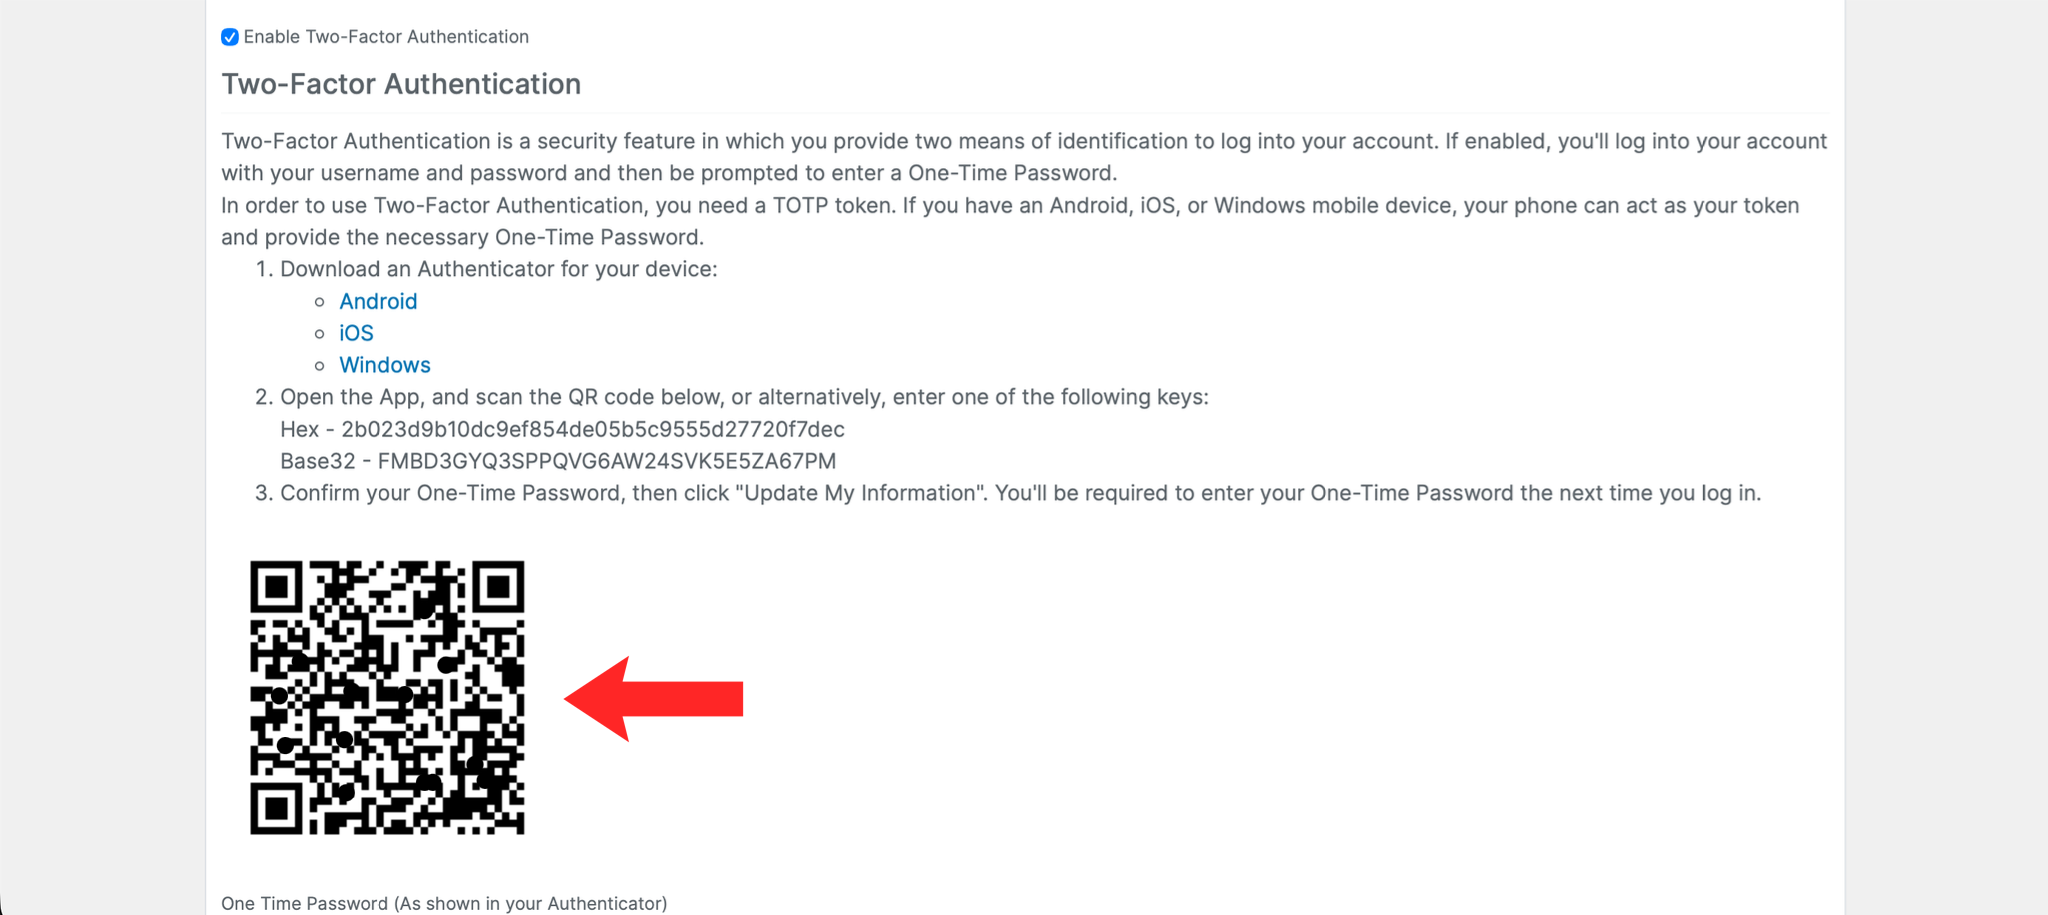
6. Confirm the Setup
Enter the 6-digit code generated by your app, along with your account password, then click Update My information.

7. Save Your Backup Code
Warning: the backup code is the only way back in if you lose your phone. Store it somewhere other than the phone itself. Without it, recovering access needs identity verification through our support team.
Record the backup code somewhere safe. You'll need it to regain access if you ever lose your device.
Next: What Is Two-Factor Authentication? explains what this protects you from.